A ClickFlare campaign can direct visitors through different paths and destinations to help maximize performance. When creating a campaign, you can choose from four different destination types depending on how you want your traffic to be routed.
This guide explains how to create a campaign that routes visitors through landers and offers.
Creating the campaign
From anywhere inside ClickFlare, open the Campaigns page from the left-hand menu.
-
From anywhere inside ClickFlare, open the Campaigns page from the left-hand menu.
-
Click + New to create a new campaign.
-
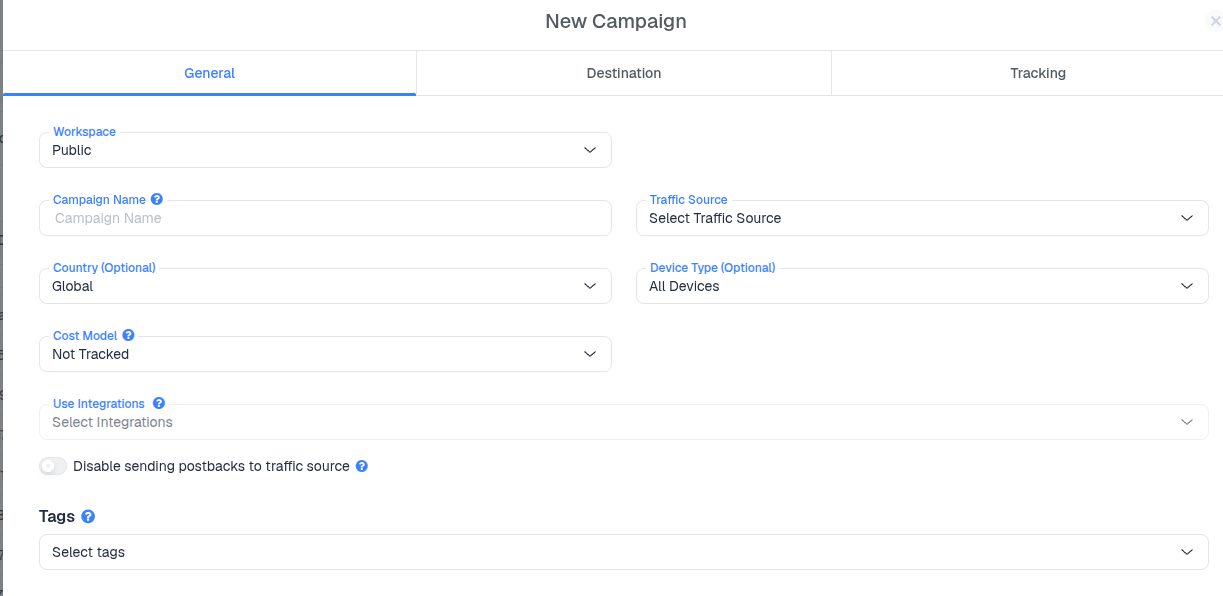
Fill in the basic campaign details:
- Campaign Name
- Traffic Source
- Cost Model
- CAPI Integrations
Optional:
- Target country or GEO (e.g., US, CA, UK)
- Target device type (e.g., Mobile, Desktop, Tablet)
- Tags to group elements by Vertical or niche
- Notes to save useful information about the campaign
Choose the tracking method
Next, select your campaign's tracking method.
-
Redirect Tracking is a classic tracking method, in which a visitor is redirected through ClickFlare's servers, by applying path-altering options, such as rule-based paths, weights, A/B testing, or AI.
Redirect Tracking sends visitors through ClickFlare before they reach the destination. This enables features such as:
- Rule-based paths
- Weighted traffic distribution
- A/B testing
- AI optimization

- Direct Tracking
Direct Tracking sends visitors directly to the destination without passing through a ClickFlare redirect.

Configure the destination
- Open the Destination tab
-
Select New Flow, then choose one of the available Redirect Modes.
- Click Add Path to create your first path (the same process applies when creating Conditional Paths).
- Select Landers & Offers
-
Next, choose:
- The landing page(s) visitors should see.
- The offer(s) visitors should be redirected to after the landing page.
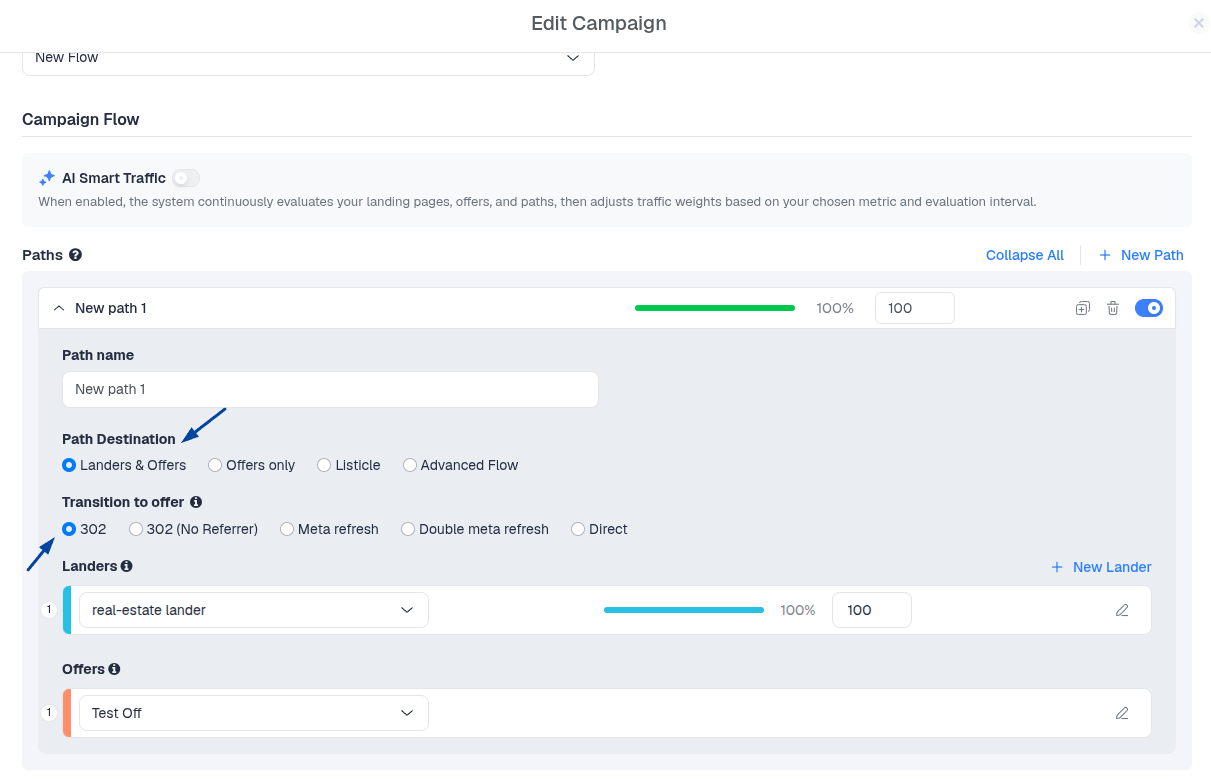
Traffic is distributed according to each element's Weight. The weight determines the percentage of traffic each lander or offer receives, with the total distribution always adding up to 100%.
Don't forget to configure the Transition to Offer option before saving the path.
Once everything is configured, click Save.
Your campaign will now appear in the Campaigns list, where you can:
- Preview
- Edit
- Clone
- Archive
the campaign at any time.
Completing the lander setup
After creating your lander and offer path in ClickFlare, you need to update your landing page so that ClickFlare can handle the transition from the lander to the offer.
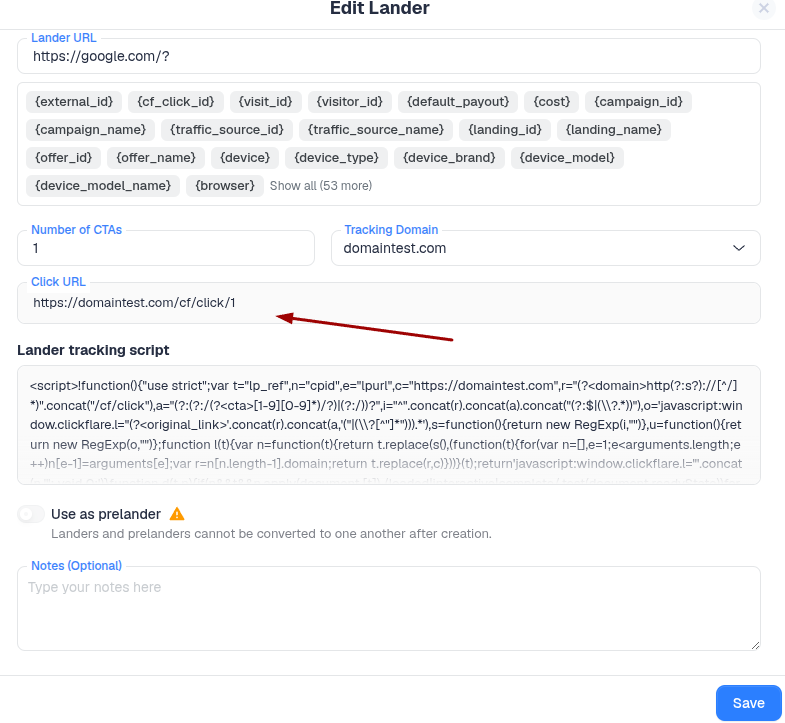
Instead of linking your CTA buttons directly to the offer URL, update them to use the ClickFlare Click URL.
Example:
https://domaintest.com/cf/click/1
This allows ClickFlare to correctly process the redirect, apply any routing logic, and accurately track the visitor's journey.
Example implementation
<a id="ip2oti" href="https://domaintest.com/cf/click/1?" class="ll-btn">Contact Us</a>
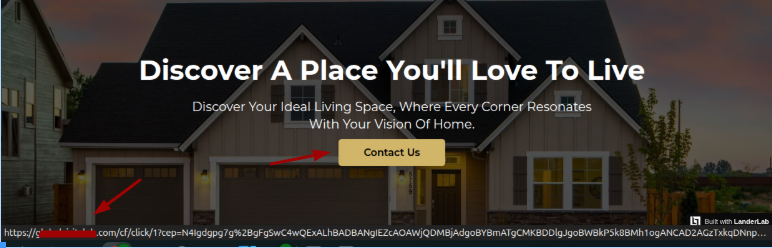
Once your CTA buttons use the ClickFlare Click URL, visitors will be redirected through ClickFlare before reaching the offer, ensuring that all clicks and conversions are tracked correctly.
Testing your funnel
Before scaling traffic, it’s important to test your funnel to ensure everything is working correctly. You can do this by:
- Clicking through the full flow from your traffic source, or by opening the campaign tracking URL in the browser
- Verifying that the redirect to the lander works correctly
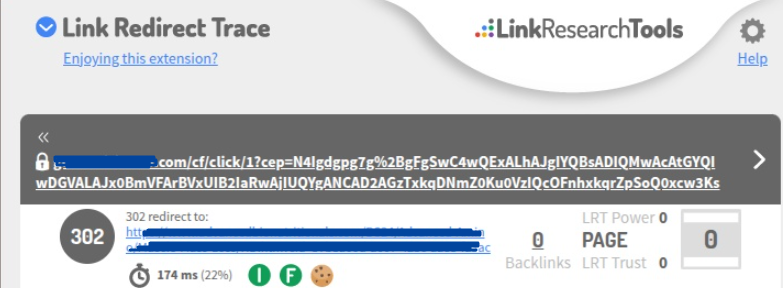
- Confirming that the CTA button redirects through ClickFlare (by hovering over the CTA button to see the ClickFlare click URL, or by checking the redirect)
- Checking that the offer page is reached successfully
- Ensuring that visits and clicks are being properly recorded in ClickFlare logs
